[Ai] "Patterns" (Discover)
HANDS-ON TUTORIALS - Use patterns to reinforce your concept and build consistency
|
Discover
← pattern
|
발견해요
← 무늬가 있는
|
|
Results for "pattern"
TOOLS AND FEATURES - View all (27)
|
"패턴"에 대한 결과
공구 및 특징 - 모두 보기(27)
-
패턴 편집 [Shift+Ctrl+FB]
-
패턴에 텍스트(베타)
-
만들어요
|
|
HELP - View all (40)
|
도움말 - 모두 보기(40)
-
패턴 만들기 및 편집
-
미술에 적용할 반복 패턴 만들기
-
패턴
-
패턴 브러시 작성
|
|
HANDS-ON TUTORIALS - View all (11)
-
Use patterns to reinforce your concept and build consistency
-
Tell a story with visual elements
-
Understanding the value of packaging
|
실습 튜토리얼 - 모두 보기(11)
|
Use patterns to reinforce your concept and build consistency
패턴을 사용하여 개념을 강화하고 일관성을 구축합니다.
|
Rita Amladi
Instructor, Adobe Learn
|
|
Use patterns to reinforce your concept and build consistency
Hands-on tutorials Beginner - 4 min
Send a consistent message to your audience while building trust. Repeating graphics, like patterns, are an excellent way to reinforce a concept.
|
Browse more
|
|
Assets can only be used in this tutorial... Read more
|
|
Rita Amladi
강사, Adobe Learn
|
|
패턴을 사용하여 개념을 강화하고 일관성을 구축합니다
실습 튜토리얼 초보자 - 4분
신뢰를 쌓으면서 청중에게 일관된 메시지를 보내십시오. 그래픽을 패턴처럼 반복하는 것은 개념을 강화하는 훌륭한 방법입니다.
|
더보기
|
|
자산은 이 튜토리얼에서만 사용할 수 있습니다. 자세히 보기
|
[1 of 3]
|
Discover
|
발견하다
|
|
Exit
|
출구
|
Arranging the pattern elements
1 of 3
|
패턴 요소 배열
3개 중 1개
|
|
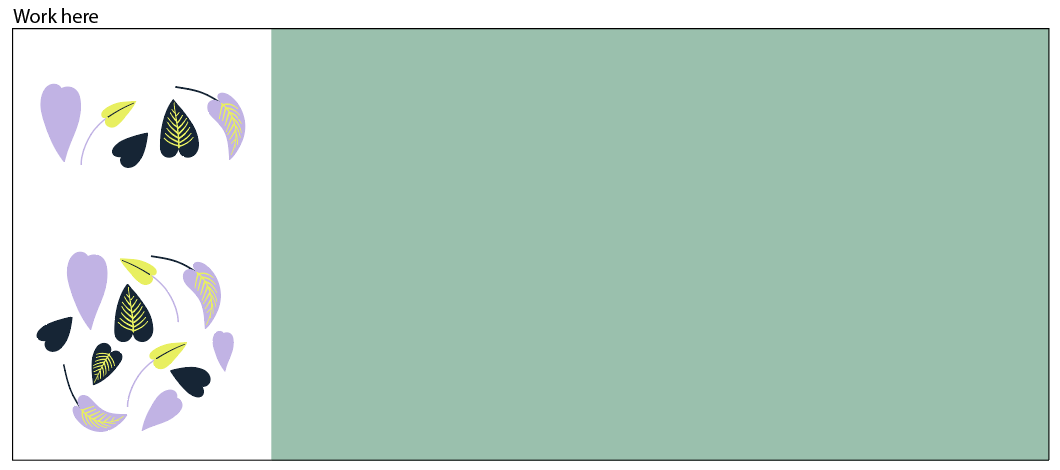
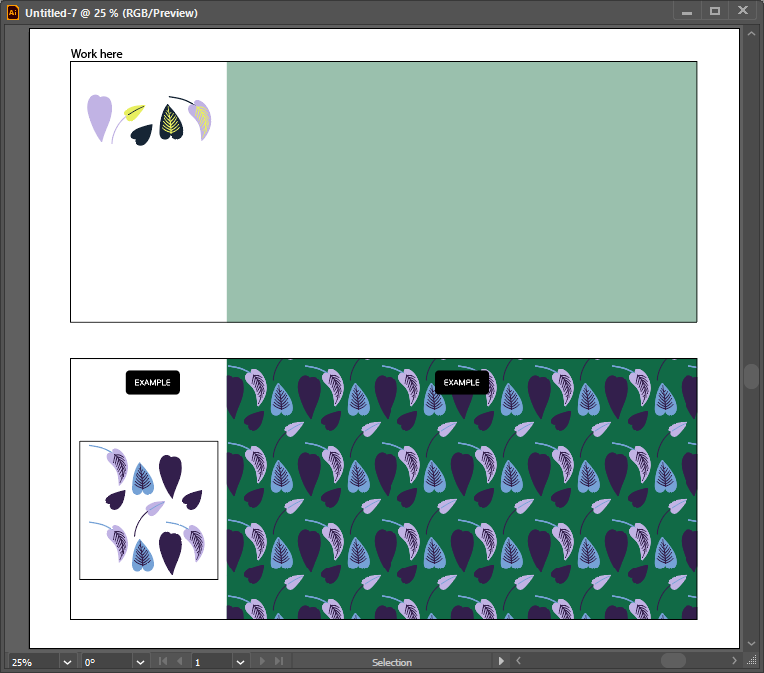
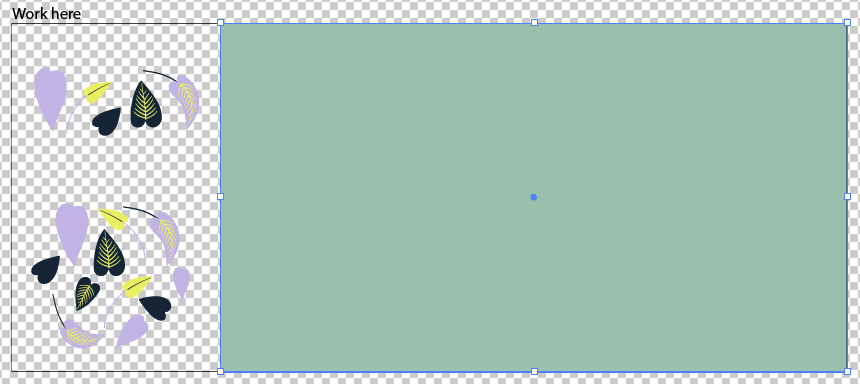
At the bottom of the artboard, you'll find an example pattern filling a shape and the original pattern artwork to the left. You'll create your own seamless pattern in the "Work here" area.
|
아트보드 하단에는 모양을 채우는 예제 패턴과 왼쪽에 원본 패턴 아트워크가 있습니다. "여기에서 작업" 영역에서 자신만의 원활한 패턴을 만들 수 있습니다.
|
|
1. Roughly arrange the leaves in a pattern. You'll be able to adjust it later in the pattern-building process.
|
1. 나뭇잎을 대략적인 모양으로 배열합니다. 나중에 패턴 작성 프로세스에서 이를 조정할 수 있습니다.
|
|
Tips:
|
Tips:
|
-
Arrange Pattern.
|
1. Roughly arrange the leaves in a pattern. You'll be able to adjust it later in the pattern-building process.
|
1. 나뭇잎을 대략적인 모양으로 배열합니다. 나중에 패턴 작성 프로세스에서 이를 조정할 수 있습니다.
|
|
|
|
[1 of 3]
Pattern elements > Arranging or building
패턴 요소를 정렬 배열 또는 조립 만드는 과정입니다.
|
[2 of 3]
|
Discover
|
발견하다
|
|
Exit
|
출구
|
Setting up a seamless pattern tile
2 of 3
|
원활한 패턴 타일 설정
3개 중 2개
|
|
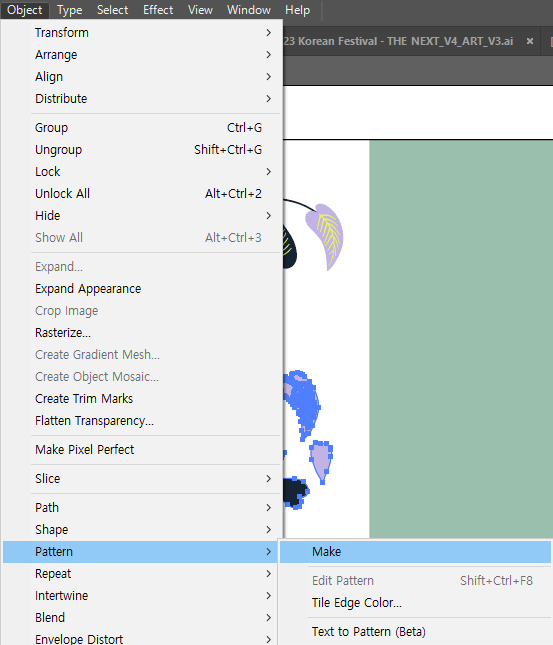
1. Select all the pattern elements and choose Object > Pattern > Save a Copy.
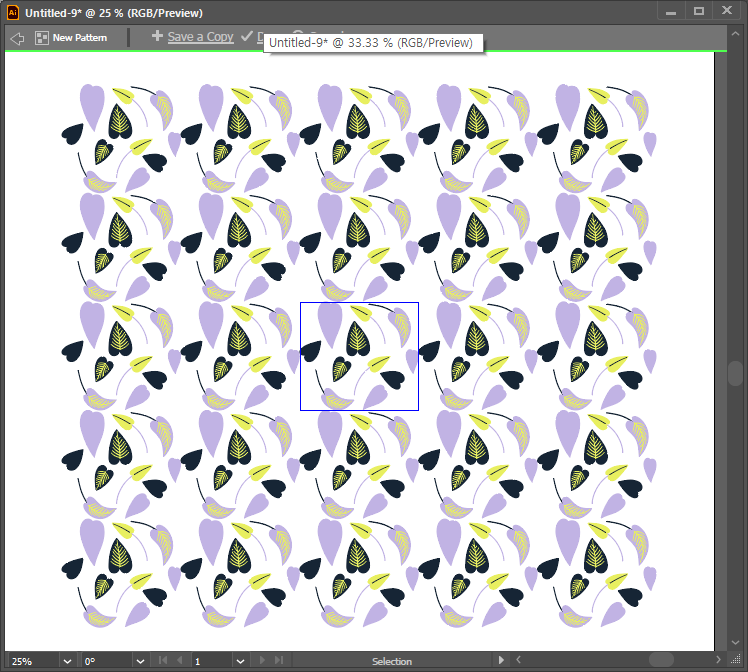
The Pattern Options panel opens and automatically creates a pattern swatch you'll use later. For now, you can adjust and refine the pattern.
|
1. 모든 패턴 요소를 선택하고 개체 > 패턴 > 복사본 저장을 선택합니다.
패턴 옵션 패널이 열리고 나중에 사용할 패턴 견본이 자동으로 생성됩니다. 지금은 패턴을 조정하고 다듬을 수 있습니다.
|
|
2. Click OK in the dialog box that appears.
|
2. 나타나는 대화 상자에서 확인을 클릭합니다.
|
|
3. In the Tile Type dropdown, try out the options such as "Brick by Column" or "Hex by Column."
|
3. 타일 유형 드롭다운에서 "열별 벽돌" 또는 "열별 육각형"과 같은 옵션을 사용해 보세요.
|
|
4. You can edit any object in the pattern tile and get a live preview. Try moving, scaling, adding, and deleting elements to create a cohesive pattern.
|
4. 패턴 타일의 모든 개체를 편집하고 실시간 미리보기를 얻을 수 있습니다. 응집력 있는 패턴을 만들려면 요소를 이동하고, 크기를 조정하고, 추가하고 삭제해 보세요.
|
|
Tips:
• To adjust the pattern tile spacing, type in the Width and Height fields in the panel.
• To help you focus on the pattern design, reduce the number of copies in the "Copies" dropdown and dim the appearance of the copies in the field below.
|
팁:
• 패턴 타일 간격을 조정하려면 패널의 너비 및 높이 필드에 입력합니다.
• 패턴 디자인에 집중하는 데 도움이 되도록 "복사본" 드롭다운에서 복사본 수를 줄이고 아래 필드에서 복사본 모양을 어둡게 합니다.
|
|
5. Then, click "Done" at the top of the document window to exit the pattern editing mode.
|
5. 그런 다음 문서창 상단의 '완료'를 클릭하여 패턴 편집 모드를 종료하세요.
|
1. Pattern Save
|
1. Select all the pattern elements and choose Object > Pattern > Save a Copy.
The Pattern Options panel opens and automatically creates a pattern swatch you'll use later. For now, you can adjust and refine the pattern.
|
1. 모든 패턴 요소를 선택하고 개체 > 패턴 > 복사본 저장을 선택합니다.
패턴 옵션 패널이 열리고 나중에 사용할 패턴 견본이 자동으로 생성됩니다. 지금은 패턴을 조정하고 다듬을 수 있습니다.
|
|
Object > Pattern > Save a Copy
|
|
|
2. New pattern Add
|
2. Click OK in the dialog box that appears.
|
2. 나타나는 대화 상자에서 확인을 클릭합니다.
|
|

|
|
The new pattern has been added to the Swatches panel.
Any changes made while in Pattern Editing Mode will be applied to the swatch upon exit.
|
|
견본 패널에 새 패턴이 추가되었습니다.
패턴 편집 모드에서 변경한 내용은 종료 시 견본에 적용됩니다.
|
|
New Document Created > Untitled-0
Untitled이름으로 새로운 파일이 생성된다.
|
|
|
|
예제 파일은 보존되어 남아있다.
|
|
|
|
|
|
Use patterns to reinforce your concept and build consistency
Would you like to continue this tutorial?
|
|
패턴을 사용하여 개념을 강화하고 일관성을 구축하세요.
이 튜토리얼을 계속하시겠습니까?
|
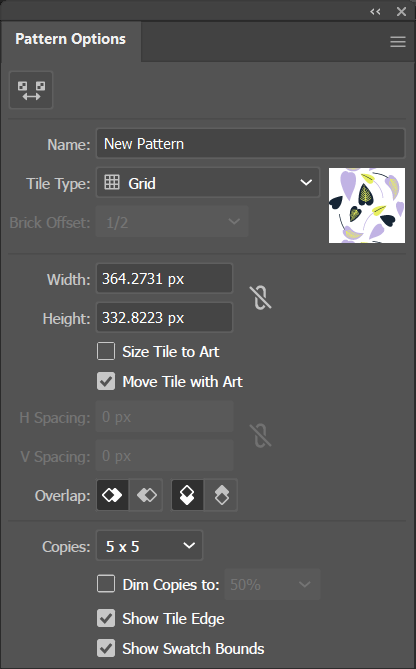
[Pattern Options] Pattern Setting Mode
|
Window > Pattern Options (Pop-Up)
|
|
|
[Pattern Options] Menu
|
|
Name: New Pattern
Tile Type: Grid
Brick Offset: 1/2
|
|
Width: 364.2731 px
Height: 332.8223 px
|
|
Size Tile to Art
✔ Move Tile with Art
|
|
H Spacing: 0px
V Spacing: 0px
|
|
Overlap:
|
|
Copies: 5 x 5
|
|
Dim Copies to: 50%
Show Tile Edge
Show Swatch Bounds
|
3. Tile Type
|
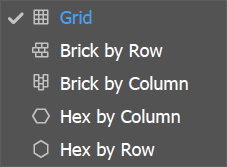
3. In the Tile Type dropdown, try out the options such as "Brick by Column" or "Hex by Column."
|
3. 타일 유형 드롭다운에서 "열별 벽돌" 또는 "열별 육각형"과 같은 옵션을 사용해 보세요.
|
[Tile Type] Dropdown List
|
|
|
-
Grid
-
Brick by Row
-
Brick by Column
-
Hex by Column
-
Hex by Row
|
-
그리드
-
행별로 벽돌
-
열별 벽돌
-
열별 16진수
-
행별 16진수
|
4. live Preview
|
4. You can edit any object in the pattern tile and get a live preview. Try moving, scaling, adding, and deleting elements to create a cohesive pattern.
|
4. 패턴 타일의 모든 개체를 편집하고 실시간 미리보기를 얻을 수 있습니다. 응집력 있는 패턴을 만들려면 요소를 이동하고, 크기를 조정하고, 추가하고 삭제해 보세요.
|
[Tips:]
|
Tips:
• To adjust the pattern tile spacing, type in the Width and Height fields in the panel.
• To help you focus on the pattern design, reduce the number of copies in the "Copies" dropdown and dim the appearance of the copies in the field below.
|
팁:
• 패턴 타일 간격을 조정하려면 패널의 너비 및 높이 필드에 입력합니다.
• 패턴 디자인에 집중하는 데 도움이 되도록 "복사본" 드롭다운에서 복사본 수를 줄이고 아래 필드에서 복사본 모양을 어둡게 합니다.
|
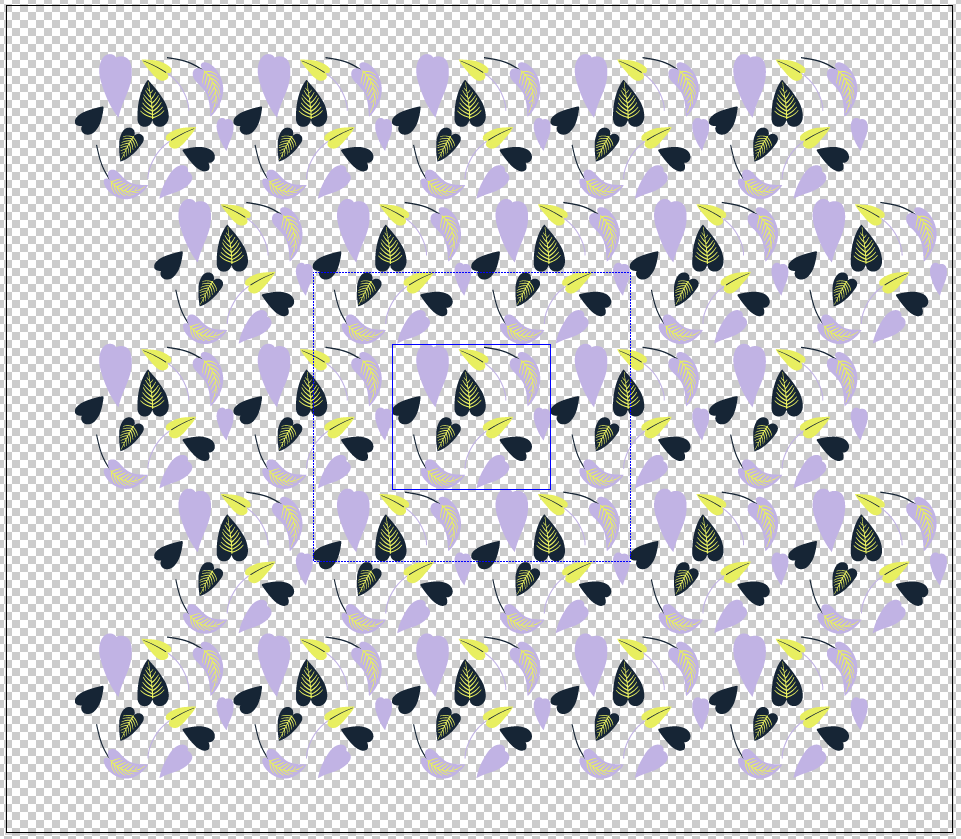
[Tile Type] Dropdown List : Brick by Row 적용한 결과
|
5. Done
|
5. Then, click "Done" at the top of the document window to exit the pattern editing mode.
|
5. 그런 다음 문서창 상단의 '완료'를 클릭하여 패턴 편집 모드를 종료하세요.
|
|
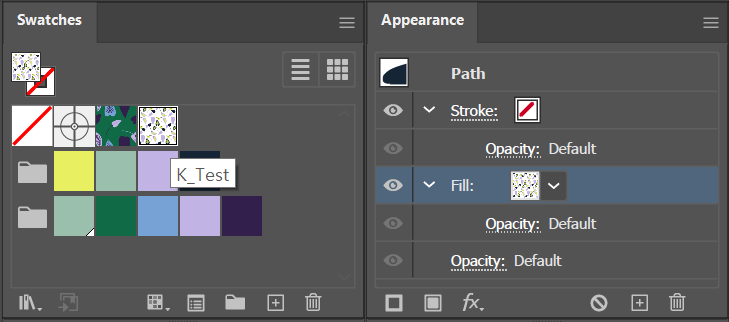
[Tip] 완료하기 전에 Pattern Options > Name: OOOOO을 지정하는것이 좋다.
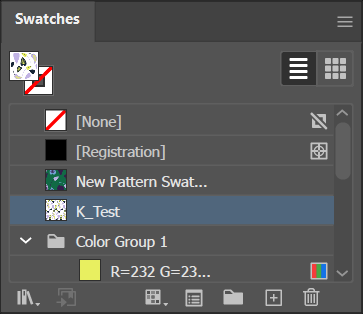
Name: K_Test
|
|

|
|
Done
|
|
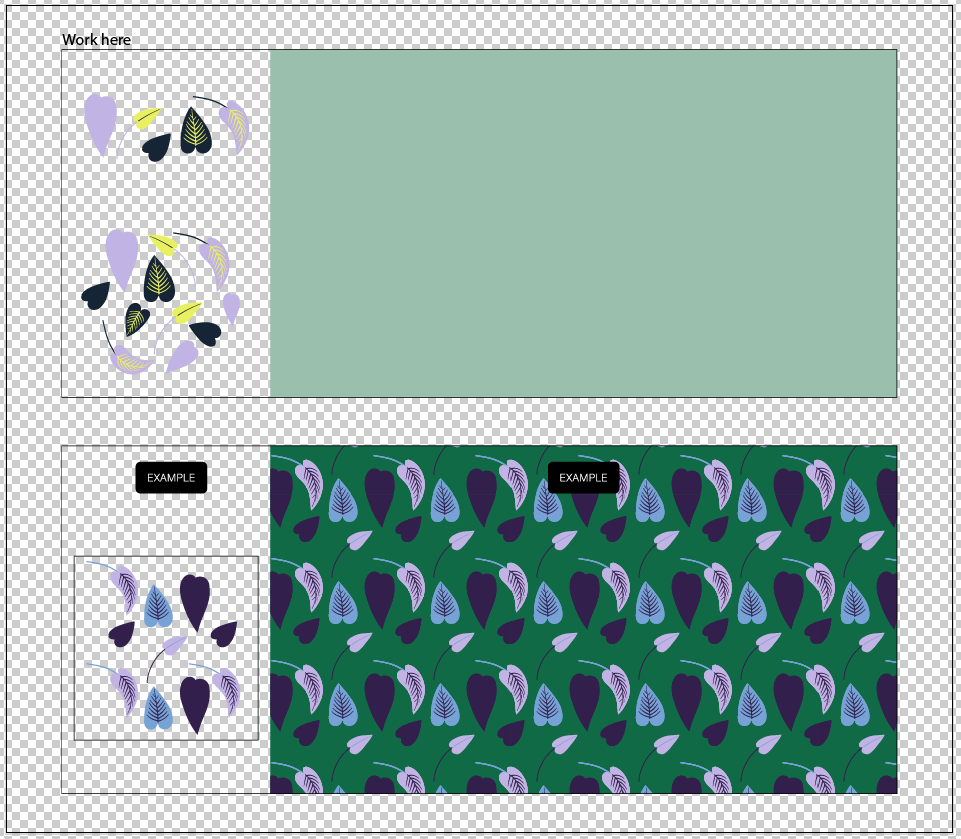
"Done"을하면 작업창으로 돌아간다.
|
|
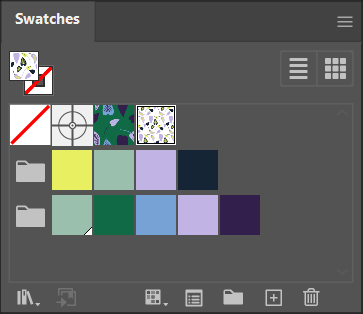
[2 of 3] Pattern elements를 Pattern Options에서 Pattern Setting 후 Swatches Panel New Pattern Add(Save) 새로운 패턴을 더하는(저장) 과정이었습니다.
|
|
[참고] Swatches Panel에 K_Test로 저장된 Pattern을 확인 하실 수 있다.
|
|
|
|
[3 of 3]
|
Discover
|
발견하다
|
|
Exit
|
출구
|
Applying the pattern
3 of 3
|
패턴 적용
3개 중 3개
|
|
1. Choose Window > Swatches.
|
1. 창 > 견본을 선택합니다.
|
|
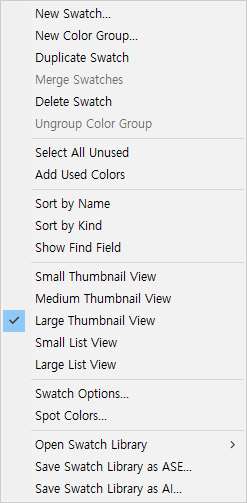
2. Select the large green rectangle and click the pattern swatch you created in the Swatches panel.
To apply a colored background, you can use the Appearance panel.
|
2. 큰 녹색 직사각형을 선택하고 견본 패널에서 만든 패턴 견본을 클릭합니다.
컬러 배경을 적용하려면 모양 패널을 사용할 수 있습니다.
|
|
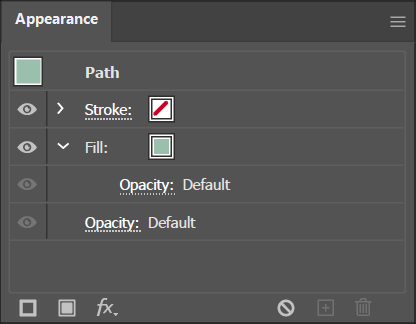
3. Choose Window > Appearance.
|
3. 창 > 모양을 선택합니다.
|
|
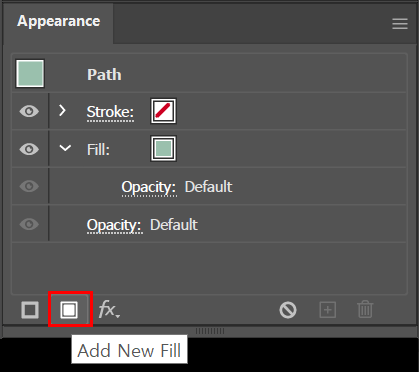
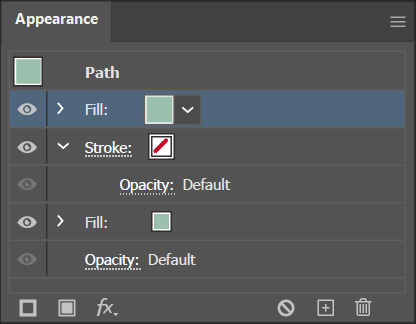
4. With the shape selected, click the "Add New Fill" button at the bottom of the panel.
This applies another fill property to the same shape, letting you create different looks in a snap.
|
4. 모양을 선택한 상태에서 패널 하단에 있는 "새 채우기 추가" 버튼을 클릭하세요.
이렇게 하면 동일한 모양에 또 다른 채우기 속성이 적용되어 한 번에 다양한 모양을 만들 수 있습니다.
|
|
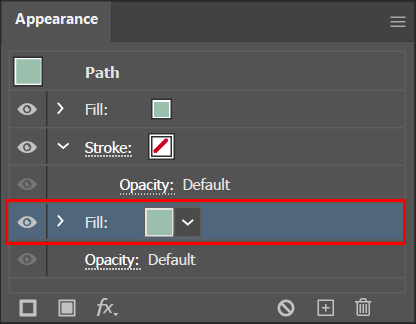
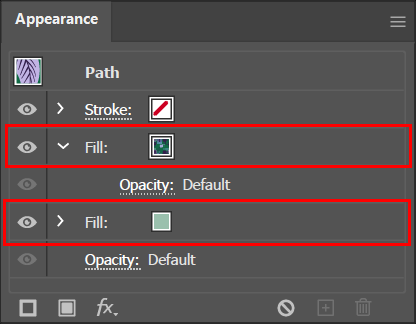
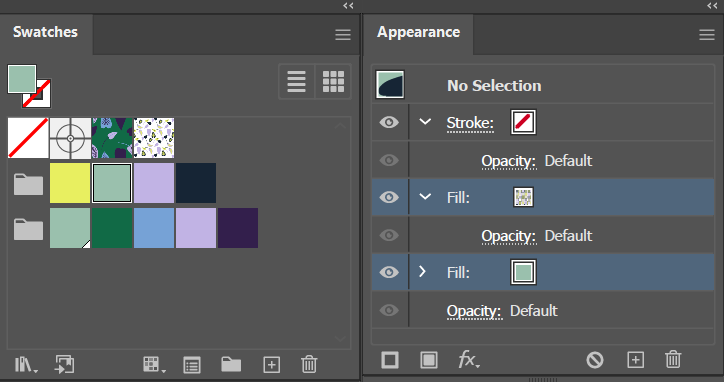
5. Select the fill box below the pattern swatch and change the fill color.
Note: The order of the fills in the Appearance panel matters! If the fill color is on top, simply drag it below the pattern in the panel.
|
5. 패턴 견본 아래에 있는 채우기 상자를 선택하고 채우기 색상을 변경합니다.
참고: 모양 패널의 채우기 순서가 중요합니다! 채우기 색상이 위에 있으면 패널의 패턴 아래로 드래그하면 됩니다.
|
1. Swatches Window
|
1. Choose Window > Swatches.
|
1. 창 > 견본을 선택합니다.
|
2. Swatches Panel
|
2. Select the large green rectangle and click the pattern swatch you created in the Swatches panel.
To apply a colored background, you can use the Appearance panel.
|
2. 큰 녹색 직사각형을 선택하고 견본 패널에서 만든 패턴 견본을 클릭합니다.
컬러 배경을 적용하려면 모양 패널을 사용할 수 있습니다.
|
|
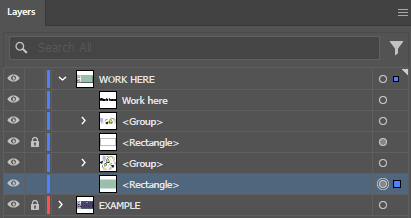
Work here Layer Rectangle 선택
|
|
|
|
|
|
Swatches panel
|
Large Thumbnail View
|
|

|
|
3. Appearance Window
|
3. Choose Window > Appearance.
|
3. 창 > 모양을 선택합니다.
|
|
Appearance panel
|
|
|
4. Add New Fill
|
4. With the shape selected, click the "Add New Fill" button at the bottom of the panel.
This applies another fill property to the same shape, letting you create different looks in a snap.
|
4. 모양을 선택한 상태에서 패널 하단에 있는 "새 채우기 추가" 버튼을 클릭하세요.
이렇게 하면 동일한 모양에 또 다른 채우기 속성이 적용되어 한 번에 다양한 모양을 만들 수 있습니다.
|
5. fill color & Order
|
Add New Fill > Click
|
|
|
|
|
|
5. Select the fill box below the pattern swatch and change the fill color.
Note: The order of the fills in the Appearance panel matters! If the fill color is on top, simply drag it below the pattern in the panel.
|
5. 패턴 견본 아래에 있는 채우기 상자를 선택하고 채우기 색상을 변경합니다.
참고: 모양 패널의 채우기 순서가 중요합니다! 채우기 색상이 위에 있으면 패널의 패턴 아래로 드래그하면 됩니다.
|
|
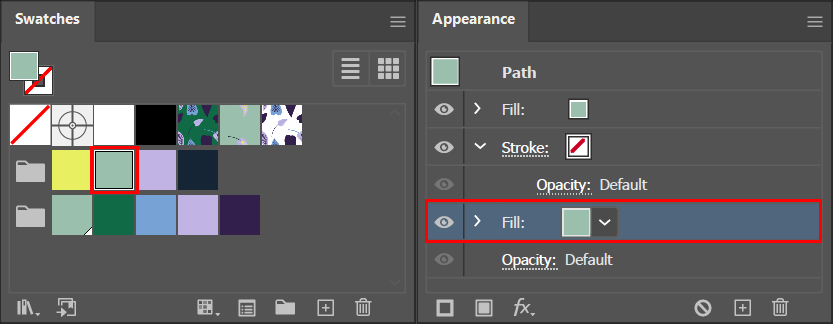
Appearance panel > Fill Select
|
|
|
|
|
|
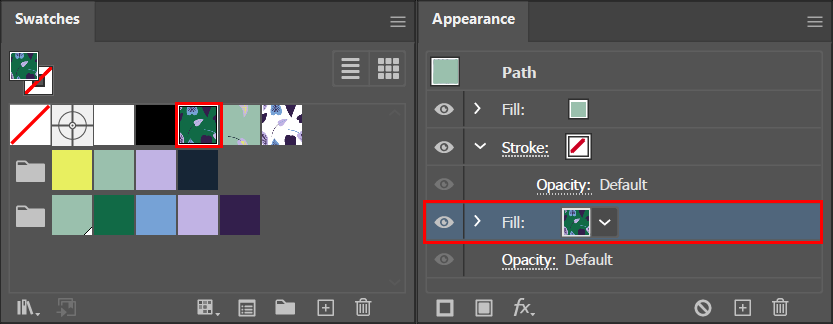
EXAMPLE에 적용된 만들어져 있는 Pattern을 Swatches에서 찾아 Fill에 적용해본다.
|
|
|
|
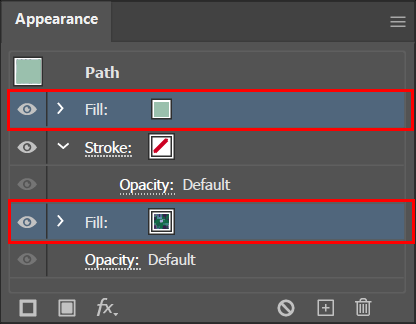
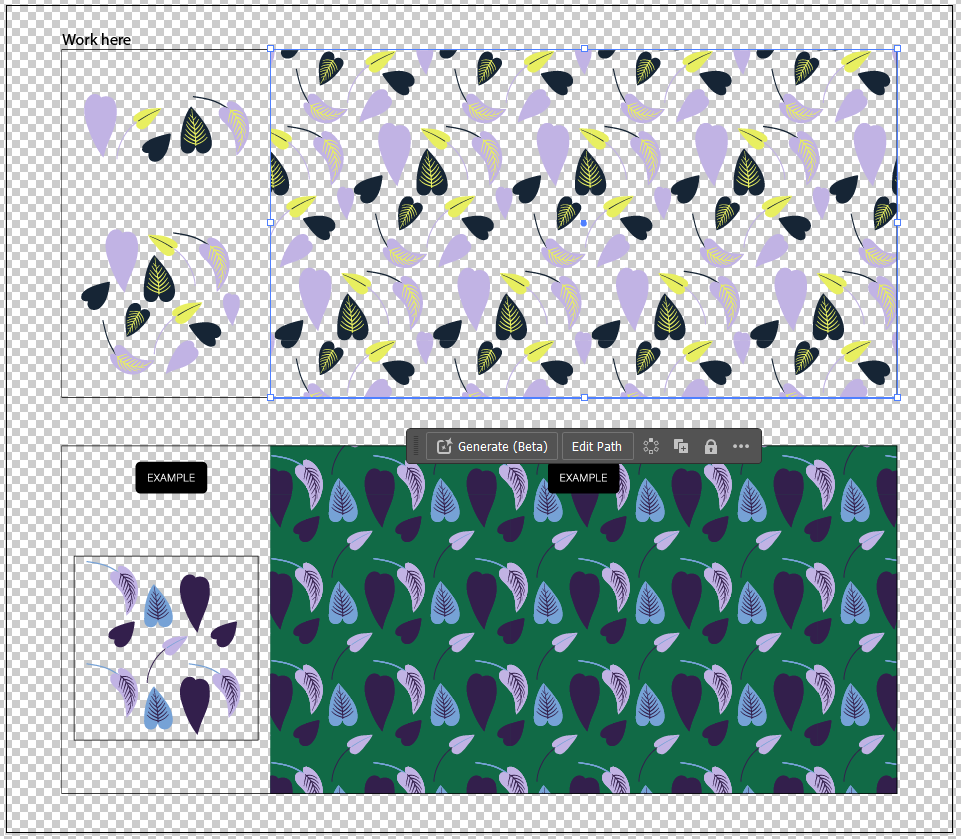
Work here Result ?
|
|

|
|
Work here에 아무런 변화 없음?
Appearance panel Fill의 적용 순서 때문에 아무런 변화가 없는 것입니다.
참고: 모양 패널의 채우기 순서가 중요합니다! 채우기 색상이 위에 있으면 패널의 패턴 아래로 드래그하면 됩니다.
|
|
Appearance panel 에서 Fill 위 아래 바꿔본다.
|
|
|
|
|
|
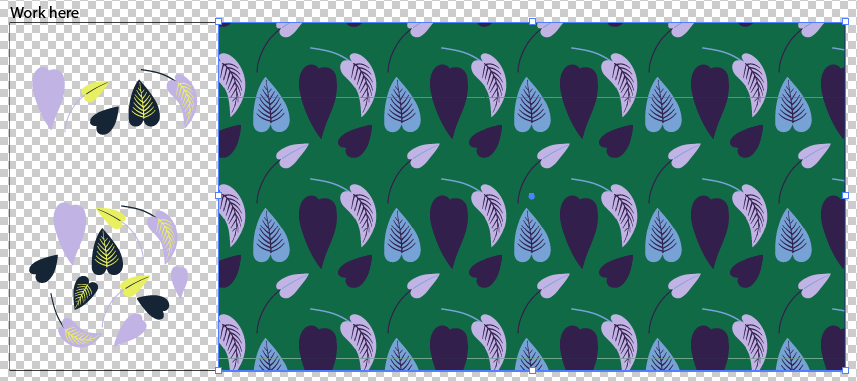
Work here Result !
|
|
|
|
[3 of 3]는 패턴타일을 적용하는 마지막과정 이었습니다.
아래의 추가된 과정은 [1 of 3] Pattern elements and [2 of 3] My New Pattern "K_Test"을 적용해 보는 다양한 방법입니다.
|
|
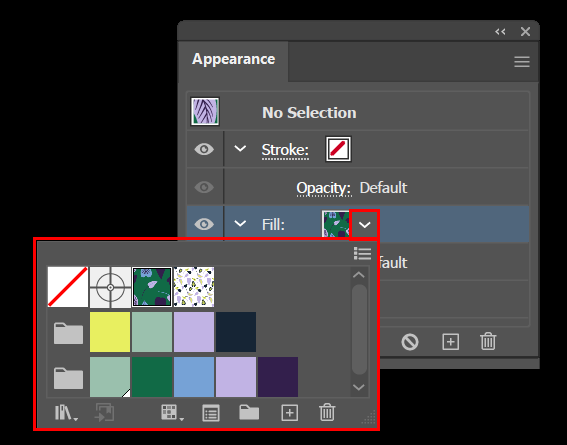
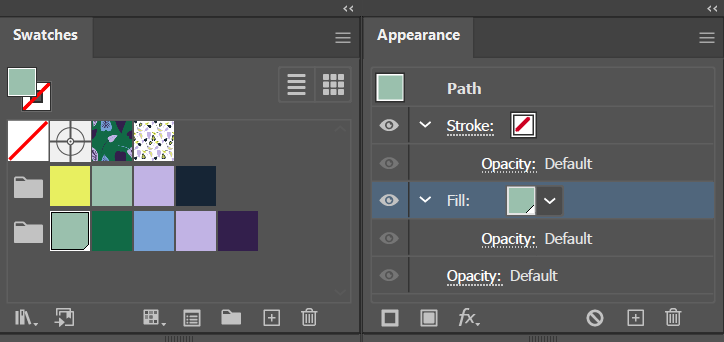
[참고]Appearance에서 Swatches Window가 열려 있지 않는 경우(Hide)
Appearance Panel에서 Fill 옵션메뉴를 누르면 Color 또는 Pattern를 쉽게 바로 변경할 수 있다.
|
|
|
|
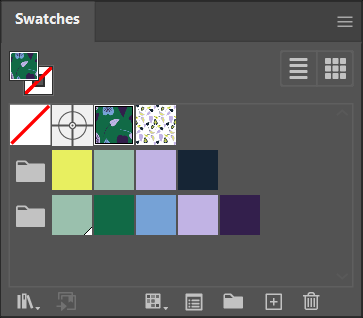
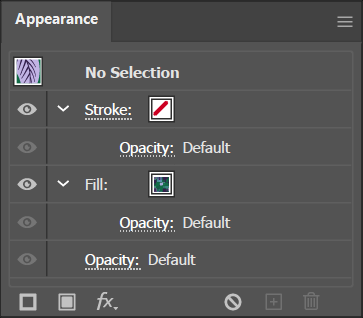
Swatches panel
|
Appearance panel
|
|
|
|
|
|
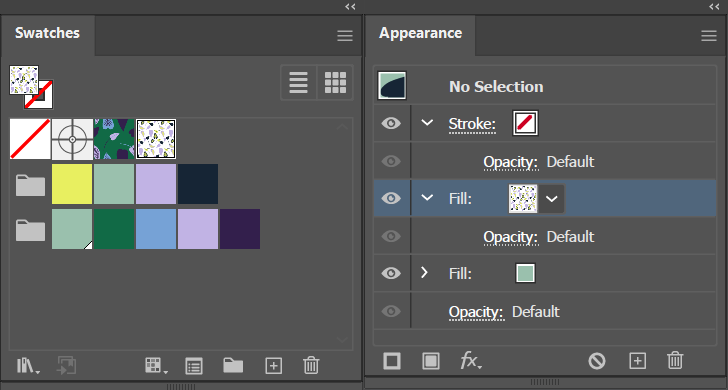
[참고] My Made New Pattern "K_Test"을 적용해 보기
|
본인이 Swatches panel 에서 적용해본다.
|
|
|
|
result
|
|
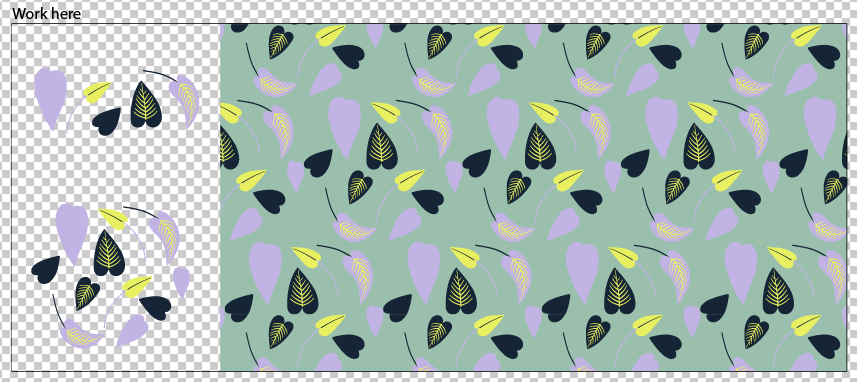
|
|
최종 견본 결과물을 확인해 본다.
|
|
|
|
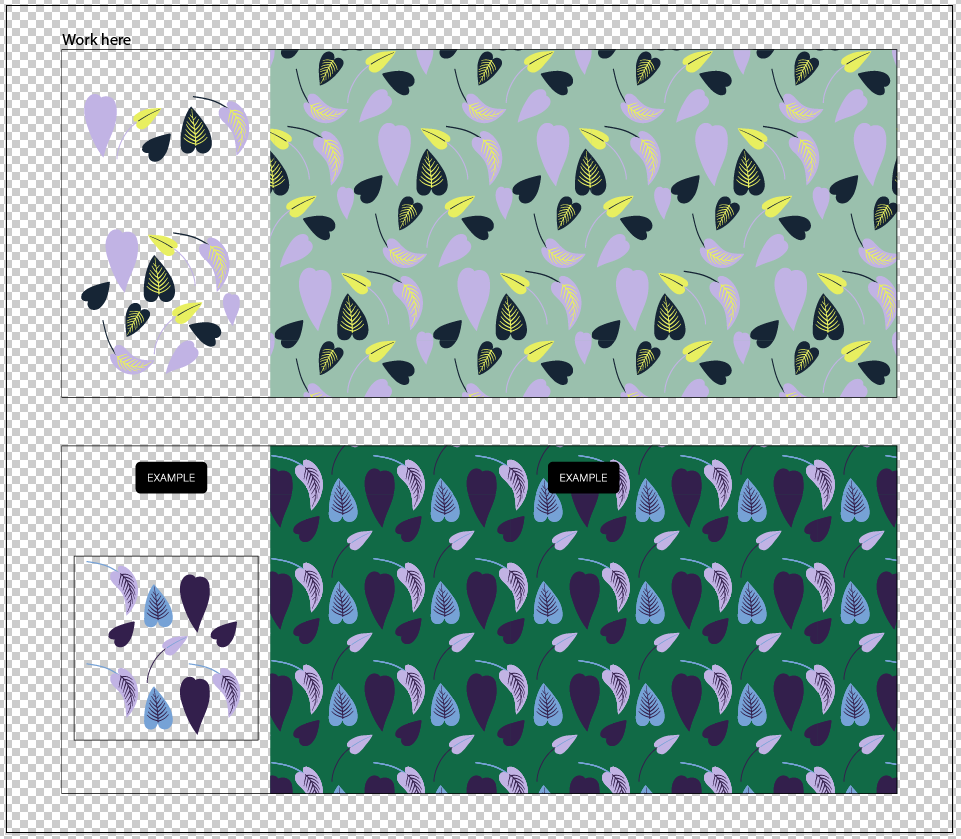
|
|
아래의 Color Fill을 삭제한 결과물
|
|
|
|
|
|
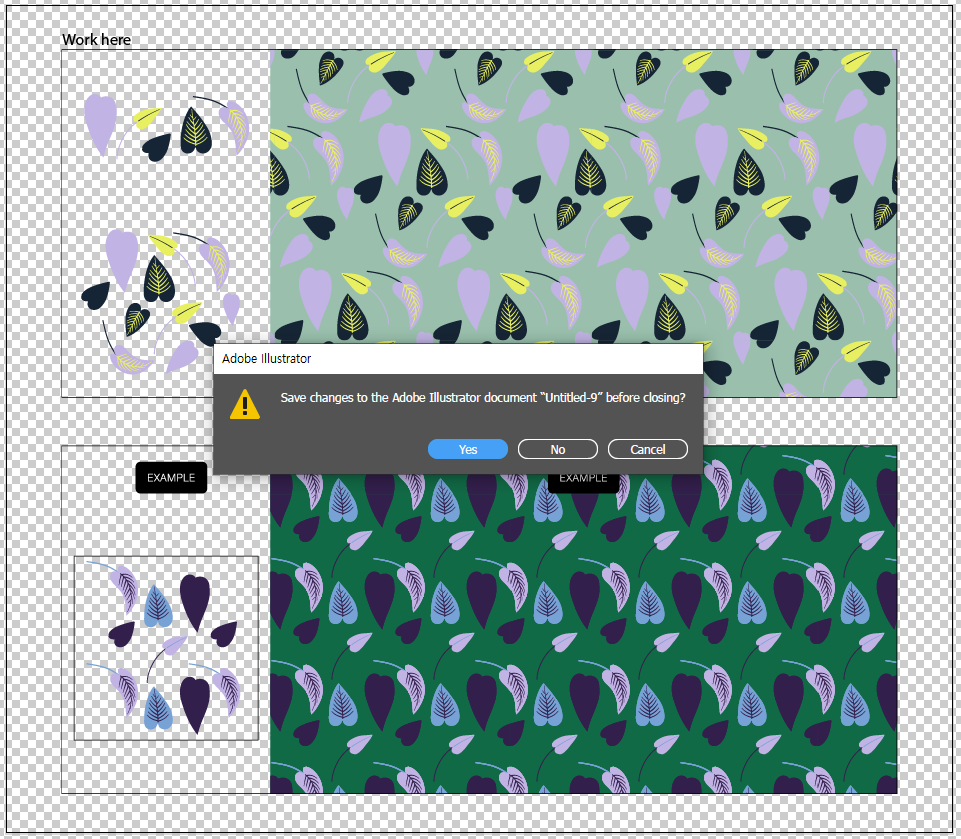
결과물을 저장해 둔다.
|
|
|
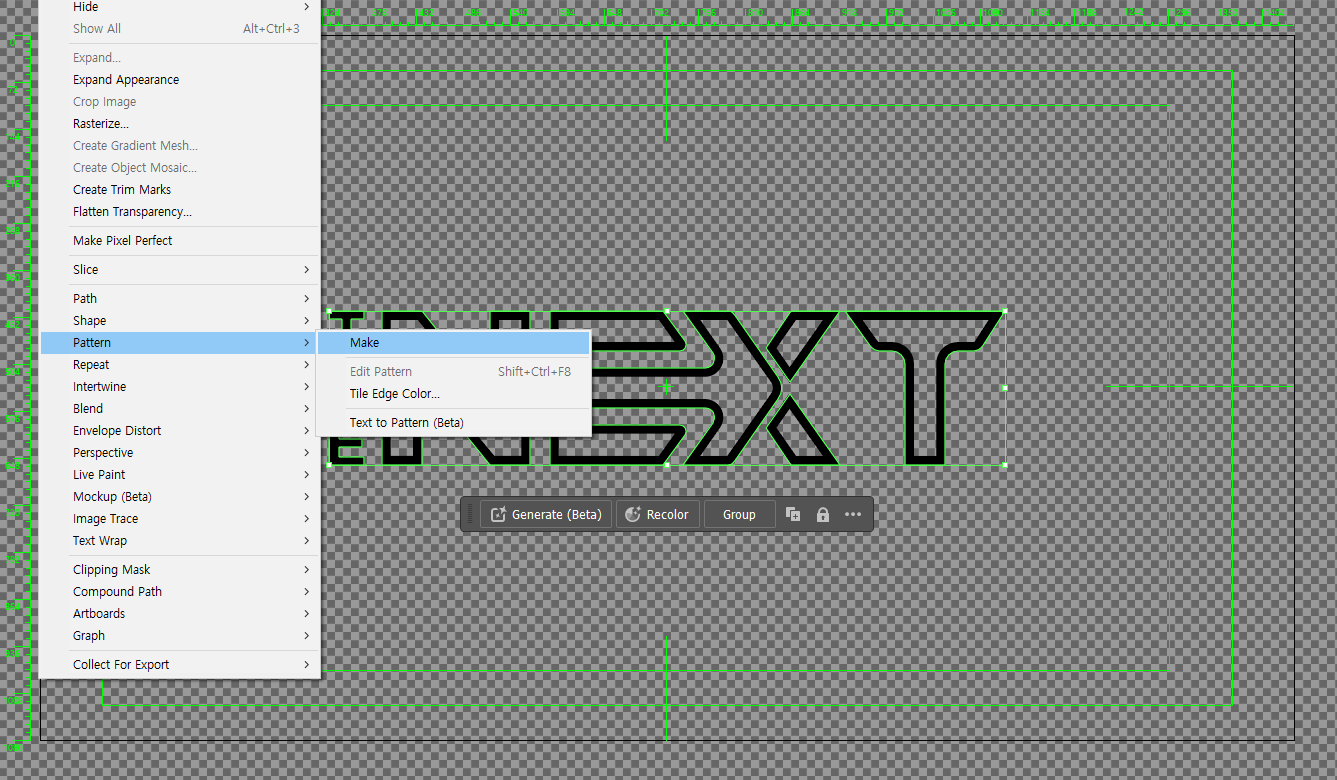
New Make Pattern
|
Object > Pattern > Make
|
|
|
|
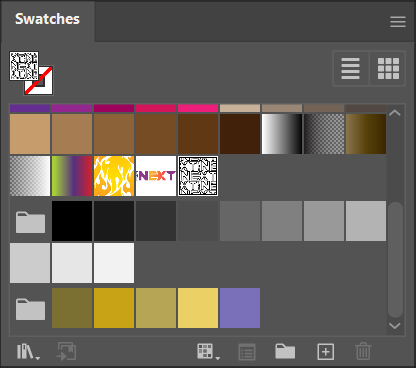
Swatches Panel
|
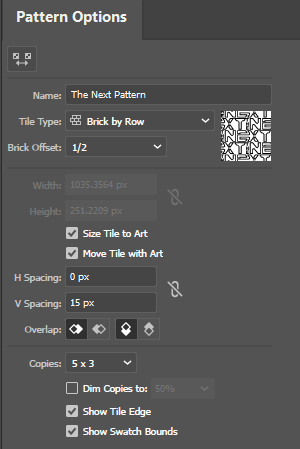
Pattern Options Panel
|
|
|
|
|
Name
|
The Next Pattern
|
|
Tile Type
|
Brick by Row
|
|
Size Tile to Art
|
Check On
|
|
H Spacing
|
15px
|
|
V Spacing
|
0px
|
|

|
Done
|
|
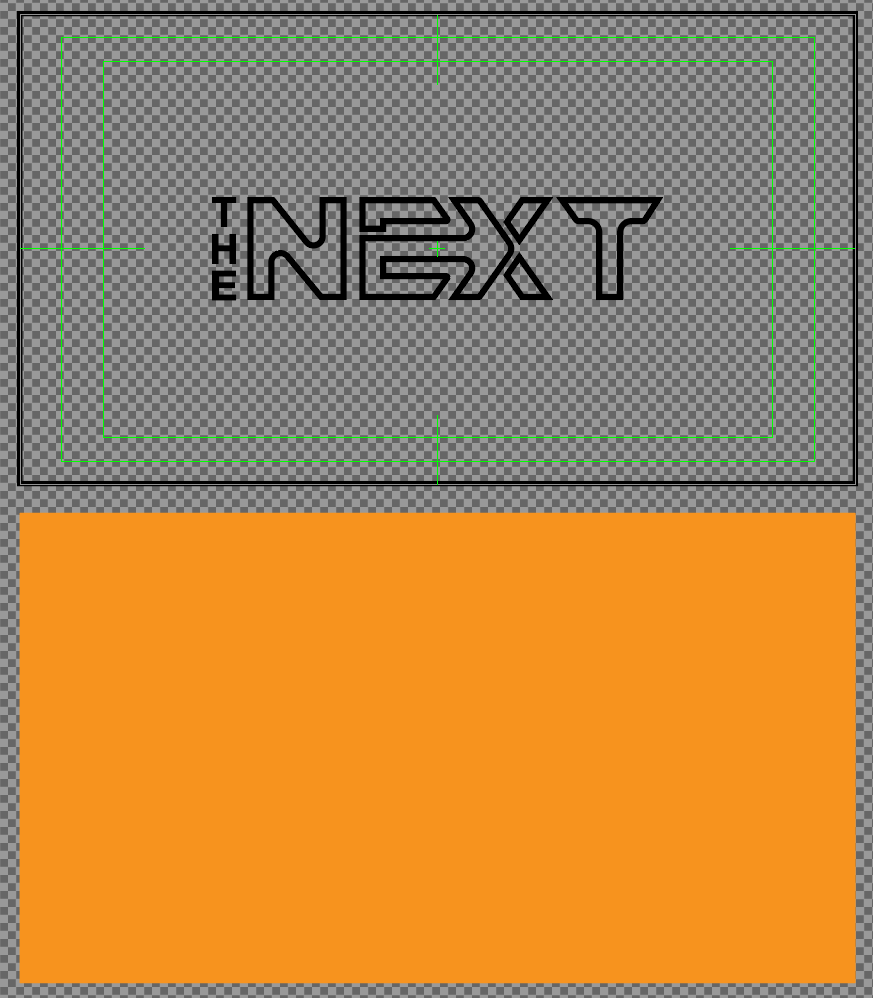
Fill을 채울 새로운 도형을 만든다
|
|
|
|
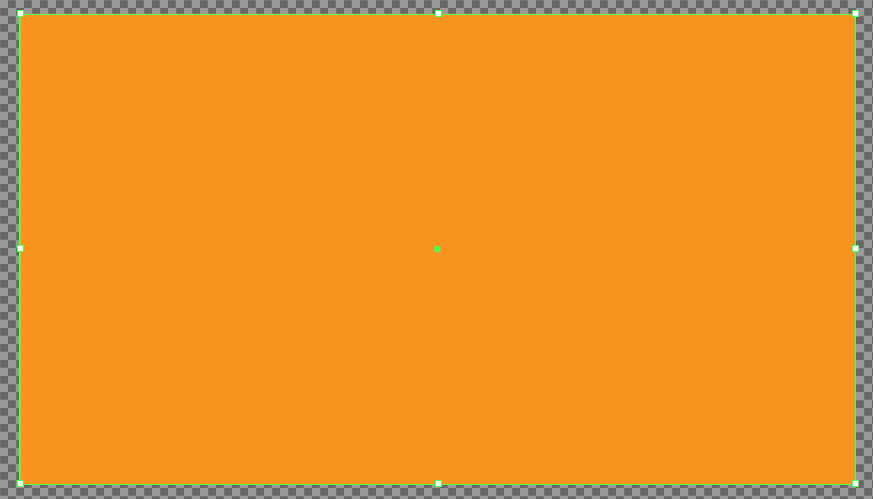
새로만든 도형을 선택 후
|
|
|
|
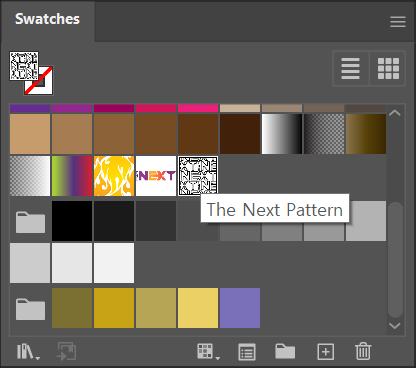
Swatches Panel 새로만든 The Next Pattern 클릭하면 아래와 같은 결과물이 나온다.
|
|
|
|
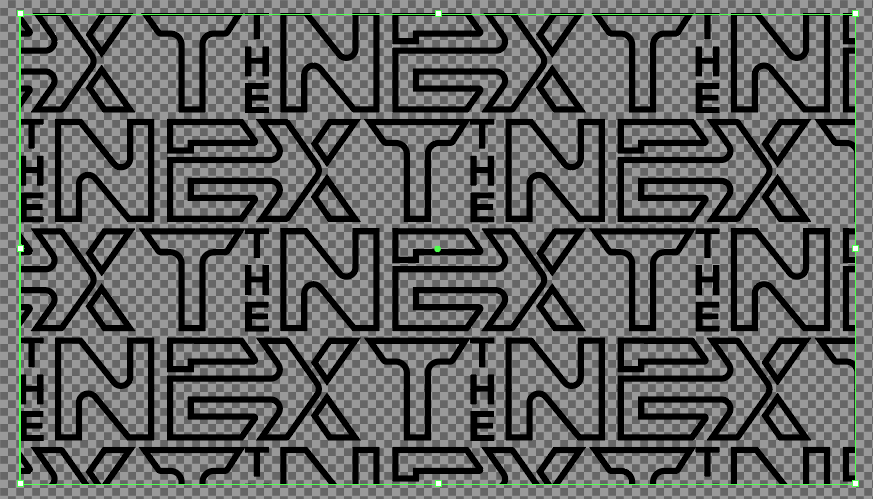
|
|
|
|
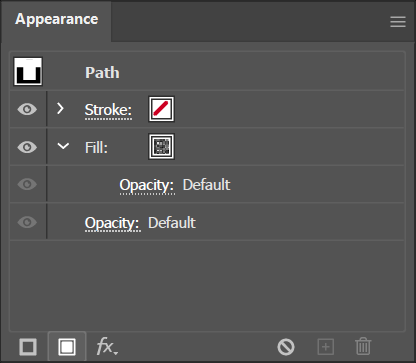
Appearance panel 을 확인
Pattern Fill 1개만 있다.
|
|
Undo 후 새로만든 도형을 선택 후
|
|

|
|
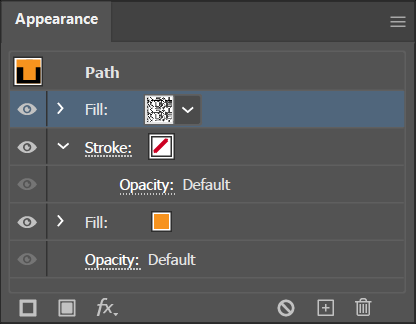
Appearance panel에서 Add New Fill을 클릭하여 새로운 레이어를 만든다.
|
|
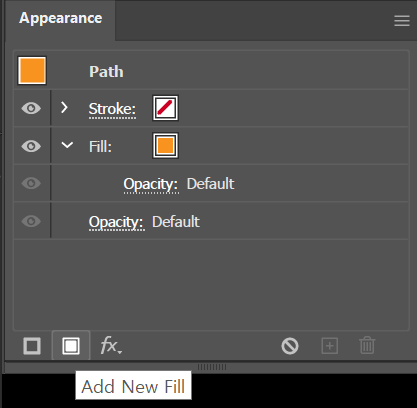
|
|
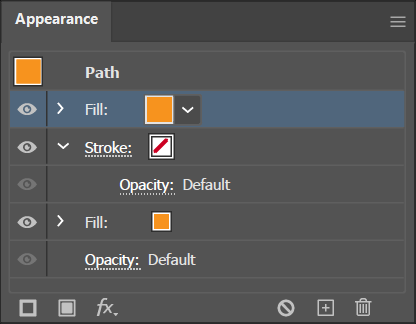
|
|
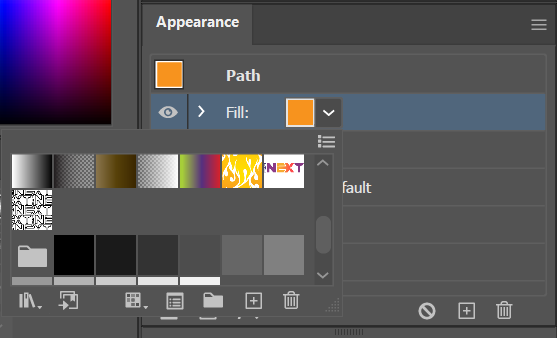
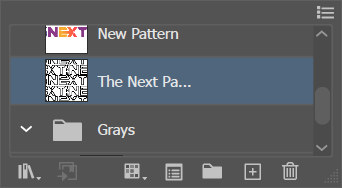
새로만든 Fill을 선택한후 The Next Pattern을 찾아서 선택한다.
|
|
|
|
|
|
Appearance panel
|
|
|
|
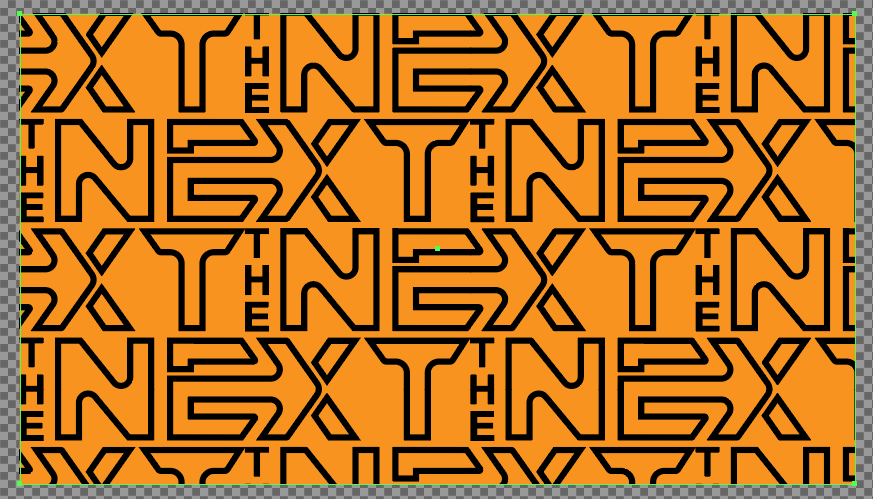
최종 결과물
|
|
|
댓글
댓글 쓰기